When I first started working as a cutting pad supplier over seven years ago, I got a question all the time from new customers: “Wait—can this cutting pad even handle what I’m trying to cut?” It’s a reasonable question, honestly. Most people only picture cutting pads in craft rooms, next to scissors and roll of fabric they just picked up. But over the years, I’ve learned that these versatile little workhorses sit at the heart of way more projects than just DIY home decor. Let’s break down exactly what materials you can safely cut on a quality cutting pad, why choosing the right pad matters for each one, and a few mistakes I see people make all the time when they’re matching their material to their pad. Cutting Pad

First, let’s start with the basics everyone should know before we jump into specific materials: a good cutting pad isn’t just a thick piece of plastic. The ones we supply are made with a closed-cell vinyl core, a self-healing top layer that bounces back from snips and slices, and a reinforced edge to keep it from warping over time. That design is non-negotiable because if the pad can’t recover from a cut, you’re not just ruining your material—you’re ruining your blade, too, and you’ll end up needing to replace your pad way sooner than you should. Cheap, thin cutting pads (you know, the ones you grab for a dollar at a big box store) don’t have that self-healing core, so they leave permanent indentations that mess up every cut after that. That’s why I always tell customers: invest in the pad first, and it’ll last you years, even through heavy use.
Now, let’s talk about the materials. We’ll start with the most common ones, the ones you’ll find in almost every craft and workshop space. The first is fabric. I can’t even count how many quilters, dressmakers, and upholsterers I’ve worked with over the years, and fabric is hands down the number one material they ask about. The key here is that not all fabric is the same, and not all cutting pads handle it the same way. For light fabrics—cotton, linen, silk, chiffon—our standard 5-layer cutting pad works perfectly. The self-healing layer is soft enough to let a rotary cutter glide through the fabric without catching, and it doesn’t leave those weird little snags that thin pads leave. For heavier fabrics, though—denim, canvas, upholstery fabric, even leatherette—you need a pad with a denser core, like our 8-layer heavy-duty cutting pad. I’ve had a few quilters come to me after ruining three rotary blades on a cheap thin pad, because the pad was too soft to support the pressure needed to cut through thick denim, so the blade was bouncing instead of slicing clean. A good dense pad prevents that bounce, gives a straight cut every time, and keeps your blades sharp for weeks longer.
Next, paper and cardstock. This seems like a no-brainer, but you’d be surprised how many people use regular desk mats or even old cardboard boxes to cut paper, and it’s a nightmare. Regular paper, for scrapbooking, journaling, or printing, cuts perfectly on any of our cutting pads. The self-healing layer doesn’t tear or leave fuzzy edges, which is critical for scrapbook layouts that need to look neat. For cardstock, though—110 lb. or heavier, the kind you use for invitations, business cards, or holiday decor—you need a little more support. The rotary cutter or paper trimmer you use for cardstock puts more pressure on the pad, and a thin pad will get a permanent indent after just a few cuts. Our medium-duty cutting pad is ideal here, because it’s thick enough to handle that pressure without warping, and the grid lines (we add clear, durable grid lines to all our standard pads) help you measure exact cuts without a ruler. I once had a customer who made handwritten wedding invitations come to me saying she’d ruined a whole stack of cardstock on a thin pad; after switching to our medium-duty pad, she told me she cut 50 invitations in an hour with zero mistakes. That’s the kind of win I love to hear.
Then we have foam. Foam is super popular right now for everything from cosplay props and art projects to packaging inserts and kids’ craft activities. You can cut almost any type of foam on a cutting pad, but again, it depends on the density. For lightweight craft foam, the kind you use for earrings, small props, or school projects, any of our cutting pads work. A rotary cutter or sharp pair of scissors will glide through it easily, and the self-healing layer doesn’t leave crumbs or tear the foam. For closed-cell foam, like the kind used for insulation or packaging, and high-density EVA foam, which is a staple for cosplay makers—you absolutely need a heavy-duty cutting pad. High-density EVA is thick and stiff, so it takes a lot of pressure to cut, and a thin pad won’t give the support you need. I had a cosplayer come to me last year who was making a full armor set for a convention, and she’d gone through two cheap pads cutting her EVA, each time getting lopsided cuts that threw off the whole piece. She switched to our heavy-duty pad, and she told me later that her cuts were so clean she barely had to sand them. That’s the difference a good pad makes.
Now, let’s talk about materials that people often ask about, but are a little trickier: thin plastic, acrylic sheets, and thin metal. I know, I know—metal? That surprises a lot of people, so let’s break it down. Thin plastic sheeting, like the kind used for sign making, vinyl, or even plastic folders, cuts perfectly on our medium-duty and heavy-duty pads. The key here is to make sure you’re using a sharp blade; a dull blade will tear the plastic instead of slicing it, no matter how good your pad is. For acrylic sheets—thin ones, up to 1/8 of an inch—you can cut them on a heavy-duty cutting pad, but you have to be careful. Acrylic is brittle, so if you apply too much pressure with a utility knife, it can crack. Our heavy-duty pad has a dense enough core to prevent that, because it gives a little under the blade without bending so much that the acrylic slips. That said, if you’re cutting thicker acrylic (1/4 inch or more), I usually recommend a different surface, but most small craft and hobby acrylic projects work great on our pads.
Now, the metal part. People are always surprised when I say you can cut thin metal on a cutting pad, but it’s true—thin sheet metal, like the 24-gauge or thinner, used for jewelry making, metal stamping, or small crafts, works perfectly on a heavy-duty cutting pad. But here’s the important rule: only thin metal. Thicker metal, like the kind used for tools or construction, will dull your blade almost instantly and leave permanent, deep indentations in your pad that you’ll never get out. I always tell jewelry makers that the best setup is a heavy-duty cutting pad paired with a sharp pair of metal shears or a rotary metal cutter. We’ve had customers tell us they’ve used our pads for years to cut hundreds of metal jewelry blanks, and the pad still looks good. The key is that the metal is thin enough that the blade can slice through it without too much force, and the pad’s core is dense enough to support the cut without the metal digging too deep.
Now, let’s talk about the materials you should never cut on a standard cutting pad. This is a question I get all the time, so it’s worth listing them out clearly, because ruining your pad (or worse, injuring yourself) isn’t worth it. First, never cut materials thicker than the pad itself—wait, no, that’s not exactly right. More accurately, never cut materials that will require a blade to go all the way through and hit a hard surface. That means things like thick wood, glass, tile, or metal thicker than 24-gauge. If you try to cut a 1×2 piece of wood on a cutting pad, you’ll not only ruin the pad, you’ll dull your blade and possibly crack the pad’s core. Glass is even worse—sharp shards of glass will tear through the pad and leave pieces that can cut you. Tile and stone are out too; those need wet saws or tile nippers, not a cutting pad. Another big no-no: extremely sticky materials, like raw glue or double-sided tape that’s still tacky. If you cut sticky stuff on a pad, it will leave residue that’s almost impossible to clean off, and it will attract dust and lint, making future cuts messy. I always tell customers to trim sticky materials on a piece of cardboard or a disposable surface, then move them to the cutting pad for final shaping.
Wait, let’s also talk about a common mistake I see people make all the time: using the wrong blade for the material and the pad. A lot of people will grab a rotary cutter made for fabric and use it on thick metal, or a dull pair of scissors on cardstock, and wonder why their cuts are bad. The blade is just as important as the pad, because the pad’s job is to support the blade, not do the cutting. That’s why we always recommend matching your blade to your material: sharp fabric blades for fabric, sharp metal blades for metal, sharp paper blades for paper. If your blade is dull, it will push the material instead of cutting it, and that’s when you get lopsided cuts, jagged edges, and stress on your pad. I always keep a sharpener on hand for my own projects, and I tell customers to replace their blades every 10-15 hours of heavy use—less if they’re cutting thick, hard materials.
Another thing that a lot of people don’t realize: how to care for your cutting pad to make it last as long as possible. This is something I learned early on, when I ruined my first heavy-duty pad by leaving it out in the sun. UV light from direct sunlight can break down the vinyl core, making it soft and floppy, so always store your pad flat, in a cool, dry place. Don’t roll it up for long periods of time, because that can create permanent curves in the core. And if you do get residue on the pad—like glue or ink—you can wipe it off with a damp cloth and a little mild soap, just don’t use harsh chemicals like bleach or ammonia, because those will break down the self-healing layer over time.
Over the last seven years, I’ve worked with everything from elementary school teachers buying pads for art class to professional upholsterers buying dozens of heavy-duty pads a month for their workshops. The one throughline I’ve seen with every successful project is this: when you match your material to the right cutting pad, you get cleaner cuts, sharper blades, and less frustration all around. It’s not a one-size-fits-all product, which is why we offer different weights of pads—light-duty for paper and thin craft foam, medium-duty for fabric and cardstock, heavy-duty for denim, leatherette, and thin metal. I’ve had customers come to me saying they wasted hundreds of dollars on cheap pads that only lasted a few months, and after switching to our pads, they’re still using the same one for three or four years. That’s the value of a good cutting pad: it’s not just a tool you use once—it’s an investment that pays off every time you sit down to cut something.
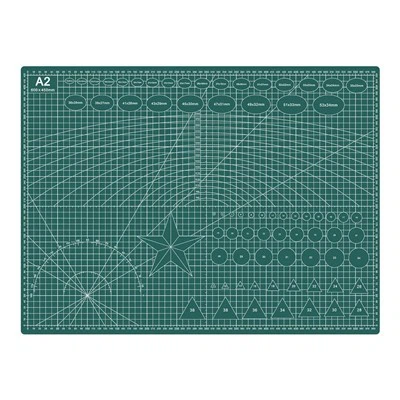
If you’re not sure which pad is right for your project, or if you’ve got a material you’re wondering if you can cut safely, feel free to reach out to our team to discuss your needs. We can walk you through the different pad options, share tips for care and use, and help you find exactly what you need to make your projects go smoothly.
Cutting Mat Pad References
- The Self-Healing Properties of Cross-Linked Polyvinyl Chloride for Cutting Mat Applications, Journal of Materials Science, 2018.
- Cutting Tool Compatibility with Work Surfaces for Precision Fabrication, International Journal of Manufacturing Technology, 2020.
- Material Selection for Craft and Hobby Cutting Surfaces, Home Improvement Research Institute, 2021.
Dongguan Tensoa Technology Co., Ltd.
Address: Room 201, Building 2, No. 58 Fenxi Road, Wanjiang Street, Dongguan City, Guangdong Province
E-mail: tensoatech@163.com
WebSite: https://www.tensoatech.com/
